How to Paint Warhammer Skin in the Grimdark Style (Step by Step)
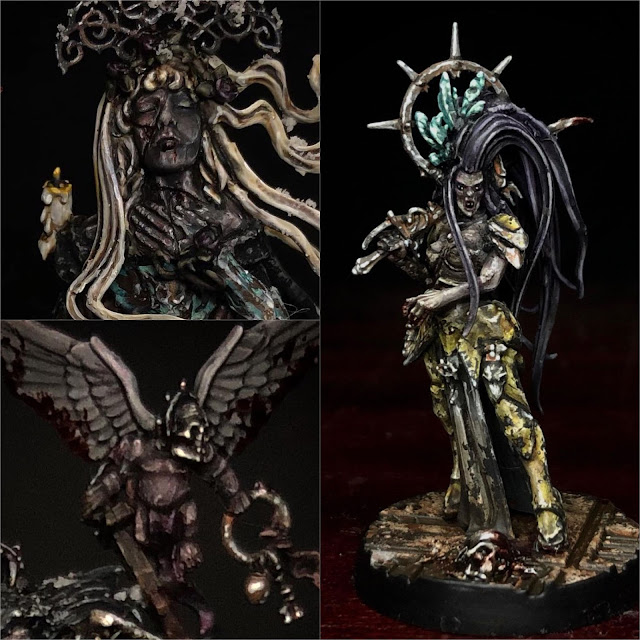
I thought at long last, I’d put
together a highly requested tutorial: how I paint the skin of my models. As you
can see from the above examples which follow these steps, the results of my
painting often result in desaturated, sickly pale tones, which are perfect for
Nurgle, Deepkin, or any models under the Grimdark umbrella. This style has
evolved from its first iteration in around 2019, though I’ve incorporated my
newly learnt skills since then, and more colours, which are included in this
tutorial! For the example below, I’m going to be using my converted Escher
Champion which I have primed with Games Workshops Mechanicus Standard Grey Spray:

I like to leave my models anywhere between six and twenty-four hours after priming before painting; this allows the primer to fully set and for me to check it over in different natural lights. Once this is done, I undercoated the skin in Games Workshop’s Rakarth Flesh paint with a Size 1 brush. I applied this coat in three milky thick layers, leaving each to dry before moving on to the next. This is my favourite Caucasian skin colour paint for my style due to its sickly and desaturated tone:

After this, I applied a wash of Agrax Earthshade with the same brush before promptly wiping away any pools and excess along the surface with a cotton bud. While this will mostly be covered later, it creates a good sketch of where shadows naturally fall, so when I apply the darker areas by hand in a moment, they will appear in more natural locations:

Using a thinned down brush, I now reapply Rakarth Flesh with a Size 000 brush onto the raised areas on the model, re-highlighting the skin:

On my wet palette, I now create a loose mixture; this consists of Rakarth Flesh, black ink or Abaddon Black, Thunderhawk Blue and Tindalos Red by Scale75. I miss the latter colours into the Rakarth Flesh until I’ve got a darker, purple tone. This mixture allows me to blend in lighter or darker versions of the same colour as I go by adding more Rakarth Flesh or black respectively, creating realistically coloured shadows:

I then, using a Size 000 brush again, wet blend this mixture into the recesses and shadows of the miniature, following the map presented to me by the prior wash of Agrax Earthshade. I blend this mixture into deeper blacks for the darkest recesses and Rakarth Flesh for the more raised edges:

Using the same brush, I then use a slightly thinned down Pallid Wych Flesh to edge highlight the skin:

Very carefully, I paint the blacks of the eyes with black ink and a Size 000 brush:

Using the same brush, I paint white dots in the centre of the black eyes with pure white paint:

Again, with the Size 000 brush, I paint a purple stripe across the eyes of the model, avoiding the whites of the eyes. This is the signature makeup of my Escher, so ignore this step if you don’t want the added hue. What is important here though is to also use the same brush and black ink to create a thin, vertical line down the middle of the eye whites. This can take a few tries to get right, but practice makes perfect. If you don’t want to be this fiddly, you can always ignore this step and leave the eyes an ominous, glowing white:

I then paint the mouth, as well as any open cuts, with Tindalos Red and the same brush:

Still using the Size 000, I paint a dot of Wraithbone onto each of the individual teeth:

For the final step, I wash the mouth with a Size 1 Brush and Agrax Earthshade, before returning to dot the teeth with pure white and paint the shadow of the lip with black ink:

I hope
this tutorial was some help to those who asked for it. The most convoluted step
is clearly the one with all the wet blending, which is a step you can ignore if
you wish, but it does a lot of good to mix in different red, blue and purple tones
into your model’s skin. You can be as liberal as you like with this step, using
all sorts of different colours to add that unnatural glow.
The final
step of course is to paint the rest of the model. I like to paint skin first on
my models which show it as it allows me to cover the face and pour all my
excited energy into that part of the model before it dissipates as the painting
session drags on.
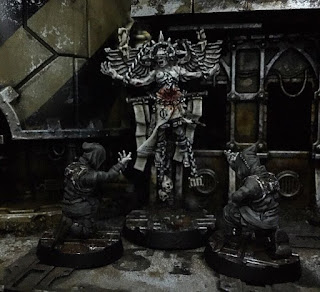
Here’s
the completed Escher:

Thanks
for reading! Let me know if you have any questions or ideas for other tutorials
I could cover!
Comments
Post a Comment